• HOME
  • NEW STORE!
  • FREEBIES
  • ELIZA LOVES
  • FAQ
  • COPYRIGHT
  • ABOUT
    • ABOUT ME
    • ABOUT MY BLOG
INSTAGRAM PINTEREST FACEBOOK TWITTER BLOGLOVIN' GOOGLE +


eliza ellis


Five Handy Tea Time Infographics with tips on catering, etiquette, serving and hosting - not to mention the history of Afternoon Tea. by Eliza Ellis

I LOVE A GREAT INFOGRAPHIC, AND TODAY, JUST FOR FUN, I'VE FOUND FIVE HANDY AFTERNOON TEA INFOGRAPHICS TO SHARE.

When I was researching my afternoon tea posts on Pinterest, I came across all these interesting infographics, and thought they'd be fun to share.

With tips on catering, etiquette, serving and hosting - not to mention the history of afternoon tea, these are a great little read - so here we go :)


Five Handy Tea Time Infographics with tips on catering, etiquette, serving and hosting - not to mention the history of Afternoon Tea. by Eliza Ellis


1. AFTERNOON TEA:

From Susan Branch comes this gorgeous, hand painted watercolor infographic. Click the image to view it full size.

Five Handy Tea Time Infographics with tips on catering, etiquette, serving and hosting - not to mention the history of Afternoon Tea. by Eliza Ellis


2. HOW TO SET A TABLE FOR TEA:

This is a really handy infographic if you've never been to or hosted a tea before, and includes lots of practical advice for setting a beautiful table! Via Creations by Leslie.

Five Handy Tea Time Infographics with tips on catering, etiquette, serving and hosting - not to mention the history of Afternoon Tea. by Eliza Ellis


3. TIME FOR TEA:

Confused.com made this handy infographic, including 'How to Avoid Getting Thrown Out 
of High Tea'! Click the image to view it full sized.


Five Handy Tea Time Infographics with tips on catering, etiquette, serving and hosting - not to mention the history of Afternoon Tea. by Eliza Ellis


4. A FEW THINGS YOU MAY NOT KNOW ABOUT AFTERNOON TEA...

Some fun afternoon tea trivia, this infographic certainly includes a few things you never would have guessed! Again, click the image to view it full sized. Via BuyAGift.


Five Handy Tea Time Infographics with tips on catering, etiquette, serving and hosting - not to mention the history of Afternoon Tea. by Eliza Ellis

5. TIME FOR TEA:

And for the true tea lovers and tea geeks, some more fun facts from Emma Bridgewater. Click the image to view it bigger.


Five Handy Tea Time Infographics with tips on catering, etiquette, serving and hosting - not to mention the history of Afternoon Tea. by Eliza Ellis


So there we go :) Lots of lovely tidbits and helpful hints, in some gorgeous looking infographics!

All the best,

Eliza.


Get my latest printables and posts in your inbox! Click here to subscribe! // elizaellis.blogspot.com.au

Share
Tweet
Pin
Share
No comments
The Golden Rules of Afternoon Tea Etiquette by Eliza Ellis

YOU DON'T HEAR MUCH ABOUT ETIQUETTE THESE DAYS.

I mean, we all say please and thankyou, and most of us have a fair grasp of the social niceties, but etiquette?

It's as archaic and outmoded as corsets and mourning dress!

Now, I actually collect vintage etiquette books (dorky, I know), and as delightful as they are to flick through, they're just lost in modern society.

Tea Dances, At Homes and elaborate 10 course dinner parties just aren't done anymore, and manners generally have loosened up so much that most of the old advice would be seen as affected and pretentious.

There are however, some modern occasions were etiquette still has it's place - weddings, christenings/baptisms and debutante balls are a few, and to a lesser extent, afternoon tea.

Taking tea is such a lovely old event, it simply begs for good manners, so I've written today's post of do's and dont's to help keep this little ritual as special as it deserves to be!

So here you have them - my 12 Golden Rules of Afternoon Tea Etiquette!


The Golden Rules of Afternoon Tea Etiquette by Eliza Ellis


1. CHAMPAGNE: Hold your champagne glass correctly by the stem, not the bowl - otherwise it will get warm and go flat.

2. NAPKIN: Remember to put your napkin on your lap. If you have to get up, or when you're finished, place it loosely to the left of your plate - never on your plate, and never on your chair.

3. TEA: Never add both lemon and milk to your tea, it will curdle! Choose one or the other.

4. TEA: Don't clink your spoon against the side of the cup when stirring your tea.

5. TEA: Don't lift the cup and saucer to drink - only lift the cup and leave the saucer on the table or held in your lap.

6. TEA: Don't put your pinky up! This one's an old misconception, but you should keep them down.

7. TEA: Don't cradle your cup in your hand - use the handle.

8. FOOD: There's a certain order to eat afternoon tea in, and this can change depending on where you are in the world, but generally it's sandwiches and savories first, scones second, and petit fours last.

9. FOOD: Don't pile your plate. It's afternoon tea, not an all you can eat buffet, so one thing at a time on your plate.

10. SCONES: Don't cut your scones; break them into bite sized pieces as you would a bread roll.

11. SCONES: And don't keep dipping your knife into the communal jam and cream, just put a spoonful of each on the side of your plate, and add them to one bite sized piece of scone at a time - never the whole thing.

12. SAY THANKS: Lastly, do send a thankyou note to the hostess afterwards - hand written is best, but these days a text or email can be just as lovely.


So there we go. Twelve golden rules of Afternoon Tea etiquette!

Most of these are just general, commonsense manners. Did you know them all? Where there a few new ones you haven't heard of? Let me know in the comments.

All the best,

Eliza.


Get my latest printables and posts in your inbox! Click here to subscribe! // elizaellis.blogspot.com.au

Share
Tweet
Pin
Share
No comments

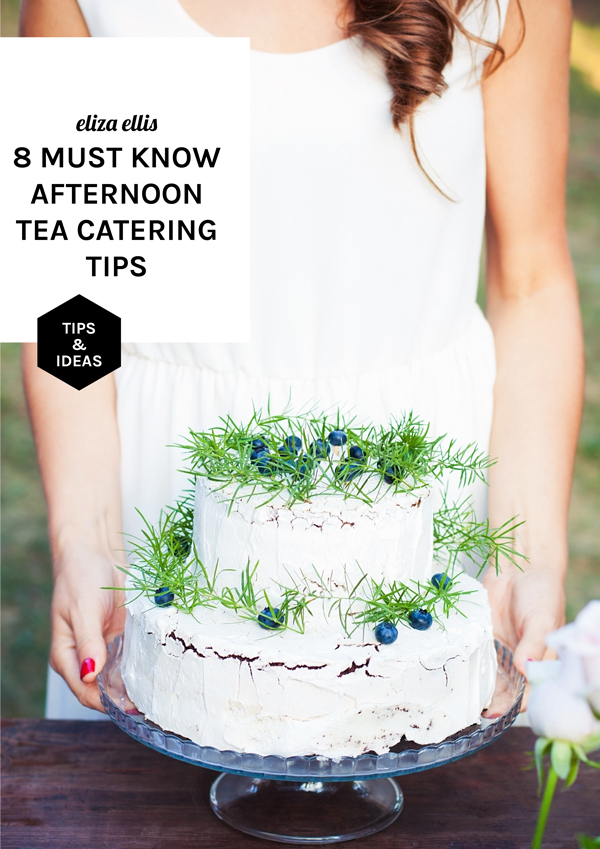
Eight Must Know Afternoon Tea Catering Tips - I've found all these tips to be so useful when catering, and I hope you do to! by Eliza Ellis

PART OF THE CHARM OF AFTERNOON TEA IS IN THE FOOD.

From the beautiful little sandwiches with their delicately flavored fillings, to the freshly baked scones, and the petit fours that are always too good to be true!

Everything is miniature and special, and looks to have been carefully handmade.

Now catering for an afternoon tea isn't difficult, but I've found there are a few things to remember to make it a success.


Eight Must Know Afternoon Tea Catering Tips - I've found all these tips to be so useful when catering, and I hope you do to! by Eliza Ellis


1. With sandwich fillings, less is more. Make them thin and easy to eat so they won't drop on anyone's lap.

2. If you sit your sandwiches on a bed of lettuce it will help keep them moist, and the bread won't go as stale as quickly.

3. Petits fours should be bite sized - three bites at the very most, and again, not so messy or fussy your guests end up wearing them.

4. If serving a full sized cake, serve it on plates so guests can eat with a dessert fork or spoon - just be prepared to have a few extra plates available so they don't have to eat their chicken sandwiches from the same dish as their cake.

5. Small cake cups or shot glasses are a great way to serve messier treats like cheesecakes, mousses, berries and cream etc.

6. To make scones really special, serve with clotted cream and homemade preserves. If you don't make your own, you can generally find heaps of preserves at your local Farmer's Market, and clotted cream is available in most supermarkets.

7. You don't have to make it all! Bought macarons and petit fours are absolutely fine ... though I wouldn't go so far as including Tim Tams!

8. And lastly, don't overfill the cake tiers or plates. It's a tea, not all you can eat. Let your gorgeous creations shine by giving them the space to be appreciated, and if you need more space, use more plates.


I've found these eight tips to be so useful when catering myself, I hope you do too!

All the best,

Eliza.


Get my latest printables and posts in your inbox! Click here to subscribe! // elizaellis.blogspot.com.au

Share
Tweet
Pin
Share
1 comments
How to Make the Perfect Pot of Tea - a quick and easy tutorial on making beautiful tea - a must read if you're hosting an afternoon tea - by Eliza Ellis

I AM, AND ALWAYS WILL BE, A COFFEE PERSON THROUGH AND THROUGH... WITH ONE EXCEPTION...

And that's when I visit my grandparents, because my Grandmother makes the most beautiful cup of tea.

I remember many years ago, my parents were in Melbourne for the day, and I fell over at school and cut my knee rather nastily.

The school couldn't reach my parents, and as I was pretty upset and shocked by it all, (I was about 9, I think), they called Grandmother to come and pick me up.

So she took me back to her office, and made me some tea.


How to Make the Perfect Pot of Tea - a quick and easy tutorial on making beautiful tea - a must read if you're hosting an afternoon tea - by Eliza Ellis


Well! I didn't drink tea at all then, and I didn't particularly like it, but nevertheless, I remember sitting there with a fine old blue willow cup and saucer in hand, drinking it down, and with every sip I felt so much better, that by the end, I was completely restored and right as rain...

With the exception of the big gash in my knee lol, but dad took me out to the hospital when he got home and we got that all fixed up later.

At any rate, to this day, Grandmother's tea still comes in a blue willow teacup, and it's cheerful, rosy hue is just wonderful to catch up over - I always find it just as magically restorative too!

For this post today, I've asked her advice to share with you on How to Make the Perfect Pot of Tea, so you can easily whip some up when friends come over, or to serve at an Afternoon Tea.


How to Make the Perfect Pot of Tea - a quick and easy tutorial on making beautiful tea - a must read if you're hosting an afternoon tea - by Eliza Ellis


YOU WILL NEED:

- Loose leaf tea
- A teapot
- A kettle
- A tea strainer
- Sugar, milk and lemon wedges - depending on people's preference.

STEP ONE:

Boil the kettle, fill your pot up with the water and leave it to heat.

STEP TWO:

Fill the kettle with fresh water, and put it on to boil for your tea.

STEP THREE:

When the kettle clicks, empty your teapot - it should be lovely and warm by now - and add one rounded teaspoon of tea leaves per person, and one extra for the pot.

STEP FOUR:

Take the pot to the kettle, and fill with as much water as needed. The water should be slightly off the boil now, which is the perfect temperature.

(Don't forget - if you're making tea for 2 people in a 4 cup pot, only fill it half way!)

STEP FIVE:

Allow the tea to steep for a few minutes. While you're waiting, add the sugar, milk or lemon wedges to the teacups, then strain the tea and serve.


AND GRANDMOTHER'S LAST TIP?

"For some reason, I don't know why, it always tastes better when you drink it from really nice china... The best cups of tea are always in fine bone china teacups. "

So there we go, an easy tutorial on making the perfect pot of rosy tea - and a great excuse for collecting some gorgeous Wedgewood and Noritake :)

All the best,

Eliza.


Get my latest printables and posts in your inbox! Click here to subscribe! // elizaellis.blogspot.com.au

Share
Tweet
Pin
Share
2 comments
Six Afternoon Tea Essentials - A few things to make your afternoon tea party an event to remember, whether it's for a bridal shower, baby shower, birthday party or just because! - by Eliza Ellis

AFTERNOON TEAS HAVE ONCE AGAIN BECOME FASHIONABLE, AND SERIOUSLY, WHAT'S NOT TO LOVE?

Getting dressed up with friends to sip champagne and tea, and gossip over gorgeous little sandwiches and petits fours is a perfectly lovely way to spend an afternoon!

Over the last month or so, I've organized one huge afternoon tea for 140, and helped out with another for 80 - both for charity - so I've been up to my ears in catering and decorations and delicacies, and I can safely say that I now know my teas!

So for the next week or so, I'm going to be sharing lots of tips and recipes for throwing the perfect afternoon tea, starting with my top six essentials today!


Six Afternoon Tea Essentials - A few things to make your afternoon tea party an event to remember, whether it's for a bridal shower, baby shower, birthday party or just because! - by Eliza Ellis


1. TABLE CLOTHS

I always go with classic white, but anything dainty and pretty will work, and much as I loathe ironing, it really is essential that you iron your table cloths!

2. LAY THE TABLE

Depending on the food, a knife-fork-spoon might be in order, or just a dessert spoon and fork.

Add in a sideplate, napkin, teacup and saucer, and water/champagne glass and you're good to go.

Place names are a delightful little touch too.

3. CHINA

Speaking of crockery, this is the time to get out those gorgeous rose teacups your grandmother gave you!

If you don't have a tea set - and many of us don't, have a look through the op-shops where they're readily available.

Individual cup-saucer-plate sets don't have to match, in fact it gives a lovely eclectic feel if they don't!

And it wouldn't be afternoon tea without a teapot!

Pots, creamers and sugar bowls - often in the most gorgeous floral patterns - are again, easily thrifted items.


Six Afternoon Tea Essentials - A few things to make your afternoon tea party an event to remember, whether it's for a bridal shower, baby shower, birthday party or just because! - by Eliza Ellis


4. TEA LEAVES

Always use leaves rather than bags for afternoon tea, and if one of the guests can read them for you afterwards, then all the better!

5. FLOWERS

Don't forget to add flowers to the table - small and dainty is best as the food will generally take center stage.

You could always add a flower sprig to each napkin or place setting too.

6. THE CAKE STAND

Last but not least, is a tiered cake stand.

You don't have to use one, but for many people, this is the piece de resistance in the centre of the table - and your guests will be sure to ooh and aah over the delightful little treats you serve up!


There you go - my top Six Afternoon Tea Essentials to make sure your event is just as gorgeous and elegant as afternoon tea should be!

All the best,

Eliza.


Get my latest printables and posts in your inbox! Click here to subscribe! // elizaellis.blogspot.com.au

Share
Tweet
Pin
Share
No comments
How To Style A Table by Eliza Ellis

SO THIS YEAR, I THOUGHT I'D SHARE SOME OF MY DESIGN IDEAS AND THOUGHTS FOR THE EASTER DINNER TABLE TOO, SO HERE IT IS - HOW TO STYLE A TABLE!

This isn't really a DIY post... it's more a chat about how to put the table together, how to use what you have, a few notes on design and lots of inspiring photos (I was channeling my inner Martha when I took these!).

That said, I explain how I make all these elements in this post: DIY EASTER HERB POTS.


How To Style A Table by Eliza Ellis


Firstly, you can't go wrong with a table laid in white - it's classic, it never goes out of style, and it always looks clean and calming.

And just as white plates always make food look it's best, a white cloth will set off any arrangements beautifully.


How To Style A Table by Eliza Ellis


So over my white linen cloth, I generally like to layer in some white texture - in this case there's the shiny plates, rough white eggs, smooth paper, and the white terracotta plant pots.

Now I just loved the DIY EASTER HERB POTS from my last post, so I ran with it and made a few more little ones with different plants - and these are the feature of the arrangement.

It's the play on textures here that makes the it really pop - you've got the wild and crazy Thyme, the delicate Baby's Tears, and the spiky straight grass (who's name escapes me... but similar plants are easy to find).


How To Style A Table by Eliza Ellis


The non matching plants make the whole arrangement look organic and unfussy - a little bit naive almost - but that's what makes it work.

The stamped signs - with their uneven ink and lettering - even the fact that the paper isn't cut absolutely straight - echo this.


How To Style A Table by Eliza Ellis


Once I've got my base textures and focal points, I often find the arrangement needs one more layer of interest to give it that 'aaah' factor. In this case, it's the gold.

The soft gold gives an added layer of interest, and the ribbon gives the whole thing movement and softness. Honestly, I just unrolled a reel of ribbon and let it fall and loop where it would, then snipped the ends neatly - too easy, and the effect is great.

The metallic tones set off the dusty white textures, and give everything a little bit of shine and movement too.


How To Style A Table by Eliza Ellis


This table centerpiece is quite detailed, but at the same time it's very simple.

You could use short glass vases filled with herbs or greenery if you don't have these pots.

You could also use fabric covered foam balls/eggs or even real eggs scattered amongst the chocolate ones... real duck eggs in all their blue hues would look absolutely stunning come to think of it.

The trick is to keep the color scheme simple and harmonious - go for a mixture of textures rather than colors - if in doubt, use less color and you can't go wrong; for example if I were to use duck eggs, I might lose the gold.


How To Style A Table by Eliza Ellis


I thought I'd share these place card holders using little chocolate bird's eggs too - even though I didn't use them.


How To Style A Table by Eliza Ellis


These would be delightful at each setting - placed on the napkin or in front of the plate.

It would be a more formal look, and you could team it with a row of the grass pots down the center of the table - the winding ribbon and scattered eggs would work really well with this look too.

So there we go! I hope this post has given you some ideas for designing and styling your own tables!

And if you have any extra tips, I'd love to hear about them in the comments below!


LOOKING FOR MORE EASTER PROJECTS? CHECK OUT MY EASY DIY BUNNY ARTWORK!
 
All the best,

Eliza.


Get my latest printables and posts in your inbox! Click here to subscribe! // elizaellis.blogspot.com.au

Share
Tweet
Pin
Share
12 comments
Older Posts

LATEST NEWS

LATEST NEWS

FOLLOW ME

  • INSTAGRAM
  • PINTEREST
  • FACEBOOK
  • TWITTER
  • BLOGLOVIN'
  • GOOGLE +

ETSY PLANNERS

FREE PLANNERS

FREE PLANNERS

FEATURED ON


ETSY FAVORITES


CATEGORIES

  • classic planners
  • free printables
  • irma planners
  • keep house
  • miscellaneous
  • organize

SUBSCRIBE

POPULAR POSTS THIS WEEK

  • FREE PRINTABLE IRMA WEEKLY PLANNERS
  • UPDATED 2017 FREE PRINTABLE CALENDARS & ORGANIZERS!
  • FREE PRINTABLE CLASSIC 2017 CALENDARS & COVERS
  • HOME ORGANIZER: MEAL PLANNERS
  • 30 MINUTES TO INBOX ZERO
  • FREE PRINTABLE IRMA 2017 MONTHLY CALENDARS & PLANNERS
  • INTRODUCING IRMA: THE NEW FREE PRINTABLES FOR 2016
  • FREE PRINTABLE IRMA 2017 WEEKLY PLANNER
  • HOW TO ORGANIZE YOUR LAUNDRY: PART ONE
  • FREE PRINTABLE IRMA ADDRESS BOOK

READER FAVORITES

  • FREE PRINTABLE IRMA WEEKLY PLANNERS
  • 12 TOP TIPS FOR DEALING WITH KID'S CLUTTER
  • HOW TO TACKLE THAT MAMMOTH TO DO LIST
  • FREE PRINTABLE IRMA MONTHLY PLANNERS
  • FREE PRINTABLE IRMA TO DO LISTS
  • FREE PRINTABLE IRMA DAILY PLANNERS
  • FREE PRINTABLE IRMA 2017 MONTHLY CALENDARS & PLANNERS
  • FREE PRINTABLE IRMA 2017 WEEKLY PLANNER
  • UPDATED 2017 FREE PRINTABLE CALENDARS & ORGANIZERS!
  • FREE PRINTABLE IRMA 2017 ANNUAL CALENDARS & PLANNER COVERS
Facebook Twitter Instagram Pinterest Bloglovin

Created with by ThemeXpose

All content is copyright of Ellis Creative Pty Ltd (ACN 115 057 568) 2017 under Australian Copyright Legislation. All rights reserved. Please read full copyright disclosure here.